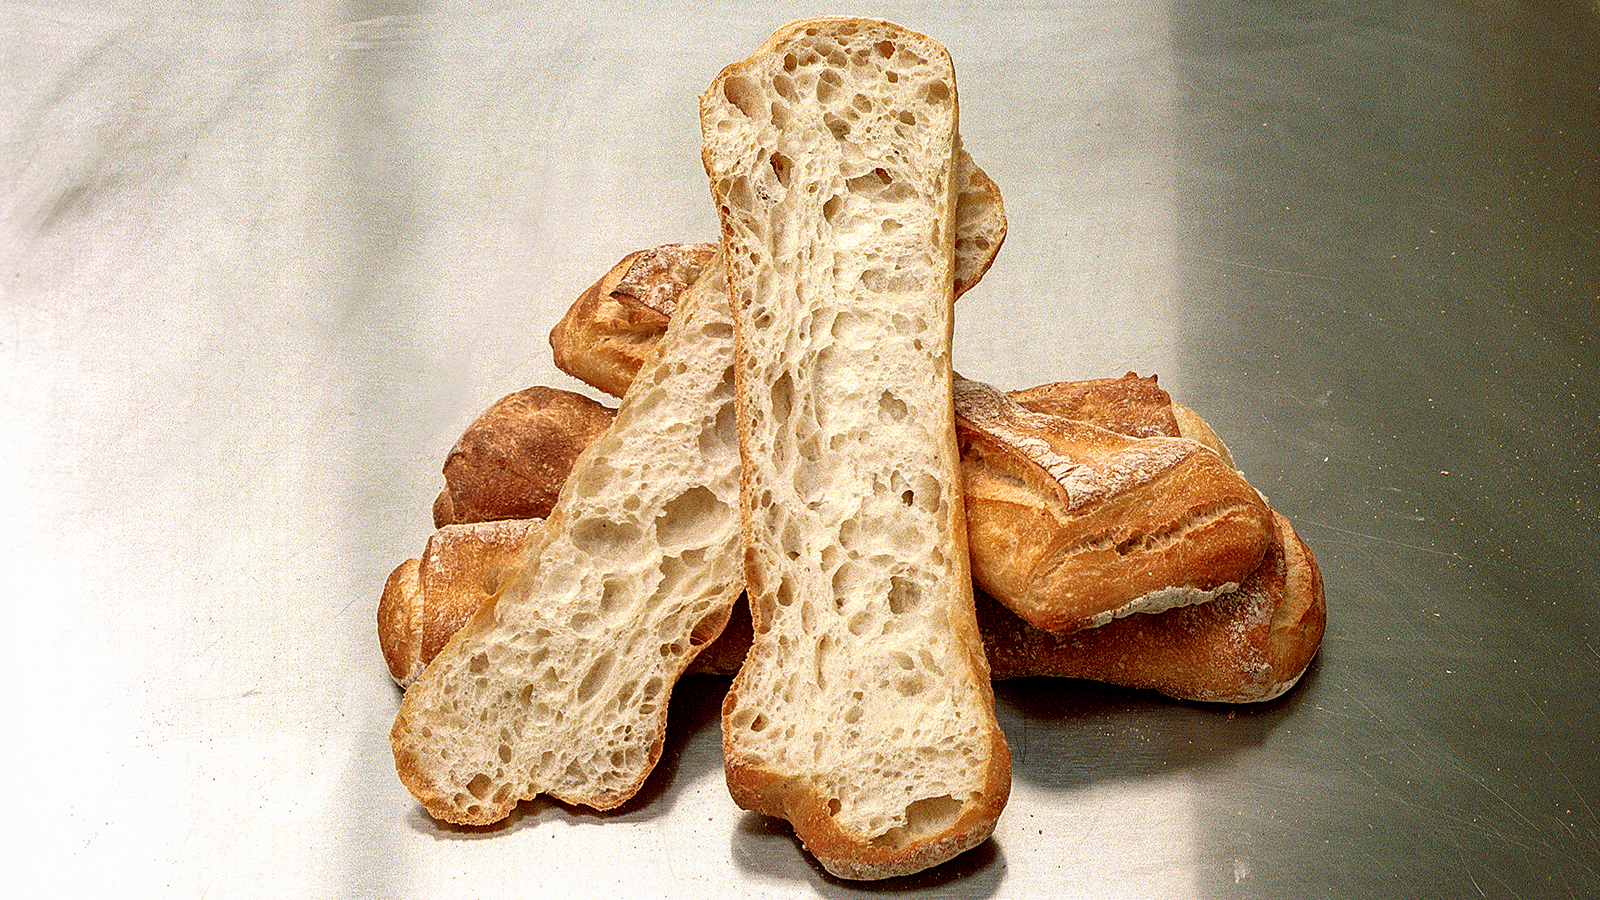
If you want holes in your bread then there are quite a few factors that affect how you exaggerate and enlarge them. So at BakeryBits we hope this discussion of the factors involved will help get you on the right track. But it's also fun and interesting when you get into it. You will see that many of these points conflict, so that’s where you have to decide what is more important to you. Do read the list all the way through to the end, as they will all - to a greater or lesser degree - need to be altered in whatever recipe you're using to get the best result.
1. A longish overall dough rising time.
Now this needs some planning, and perhaps might require tweaks to your recipe. The basic rule is: the shorter the rising time, the finer and more evenly aerated your crumb will be; the longer the rise time, the more irregular the aeration will be. Now once you add a measure of yeast and water to your flour you begin a chain reaction that will aerate and stretch the gluten in the dough until it reaches the “collapse point”. So the total possible rising time is measured from (a) the moment you mix the yeast (or sourdough), flour and water together, to (b) the point just before the dough collapses.
The total possible time your dough can rise for is affected by:
a. The protein level and quality of your flour, or mix of flours.
Generally, a high-protein roller milled white flour is able to withstand a longer total rising time and stay elastic (important for keeping the aeration at its maximum), compared to a wholemeal stoneground flour. So in simple terms, a high protein roller milled white flour is the easiest flour to use for exaggerated holes in your bread
b. The amount of yeast or sourdough used.
More or less yeast as a proportion to your flour shortens or lengthens the overall rising time, and so affects the size and evenness of the holes in your bread. For example, 7g fast action yeast in 500g, or 400g sourdough starter in 500g flour, will rise your dough in a relatively short time; whereas 2g fast-action yeast in 500g, or 80g sourdough starter in 500g flour, will rise your dough to its maximum in a longer time.
c. The temperature your dough rises at.
Yeast activity is at its optimum between 20C-30C, and the higher the temperature the faster the yeast activity. The yeast activity mainly involves two things: yeast multiplying roughly every 2 hours, and creating gas within the dough. It is also the yeast’s activity that leads eventually to the collapse of the dough. So to achieve the maximum useful rising time you need to keep the dough temperature cool but warm enough to allow the yeast activity and aeration to keep happening. You can also vary the temperature of the dough, moving it from somewhere cold to somewhere warm to speed, cooling it down will slow it.
2. The ratio of water to flour in your dough.
In simple terms: more water, more holes. But the reality is more complicated as it will depend on the other factors as well. The proteins in wheat flour swell and are able to hold water, but also the bran is able to soak up water too. Generally, roller milled high protein flour is able to hold water and create an extensible and resilient dough easily, especially important if you want to stretch and fold the dough. Typically bakers look for a ratio of around 70g water per 100g flour, what is often described as “70% hydration”, and many will take it to 80%, and some extreme recipes take it even higher. But the higher the hydration, the faster the yeast activity. So you have to take into account the temperature, flour type, and yeast quantity when you increase the hydration.
3. Manipulating the dough during the rising time.
This involves gently stretching the dough to elongate the emerging air bubbles, then neatly folding the dough upon itself to keep the dough shape compact. Between stretches and folds you probably need to leave the dough a minimum of an hour, to allow time for the bubbles to grow bigger and new ones to emerge. You might want to allow 60-90 minutes after the dough has been mixed before doing the first one, then perhaps 2-3 more times spaced about an hour apart. So the general plan is to have your dough rising 5-6 hours before baking to allow for a few stretch and fold movements, and to get a good chance of developing.
4. Delay the addition of salt until the end of mixing.
Ideally add the salt 20-30 minutes after the addition of the leavening (yeast or sourdough). When you add salt to the dough it has a tightening effect on the proteins, so if the salt is added around the same time as the leavening it tends to cause a closer but more even crumb texture: ideal if that’s what you’re aiming for, like in a classic sandwich loaf. But if you want a more exaggerated aeration then delayed addition of salt is very helpful in achieving this.


