Your transition from hobbyist to baking maestro...
The rite of passage that signifies the change from happy home baker to budding artisan bread maestro begins perhaps at the moment you start to unwrap the proofing basket or banneton that you finally decided you had to order from BakeryBits. This is the day you start to craft the shape and crust of your bread more finely, and from that point onwards, your baking will never be the same again. Especially on those occasional days when the dough sticks to it infuriatingly.
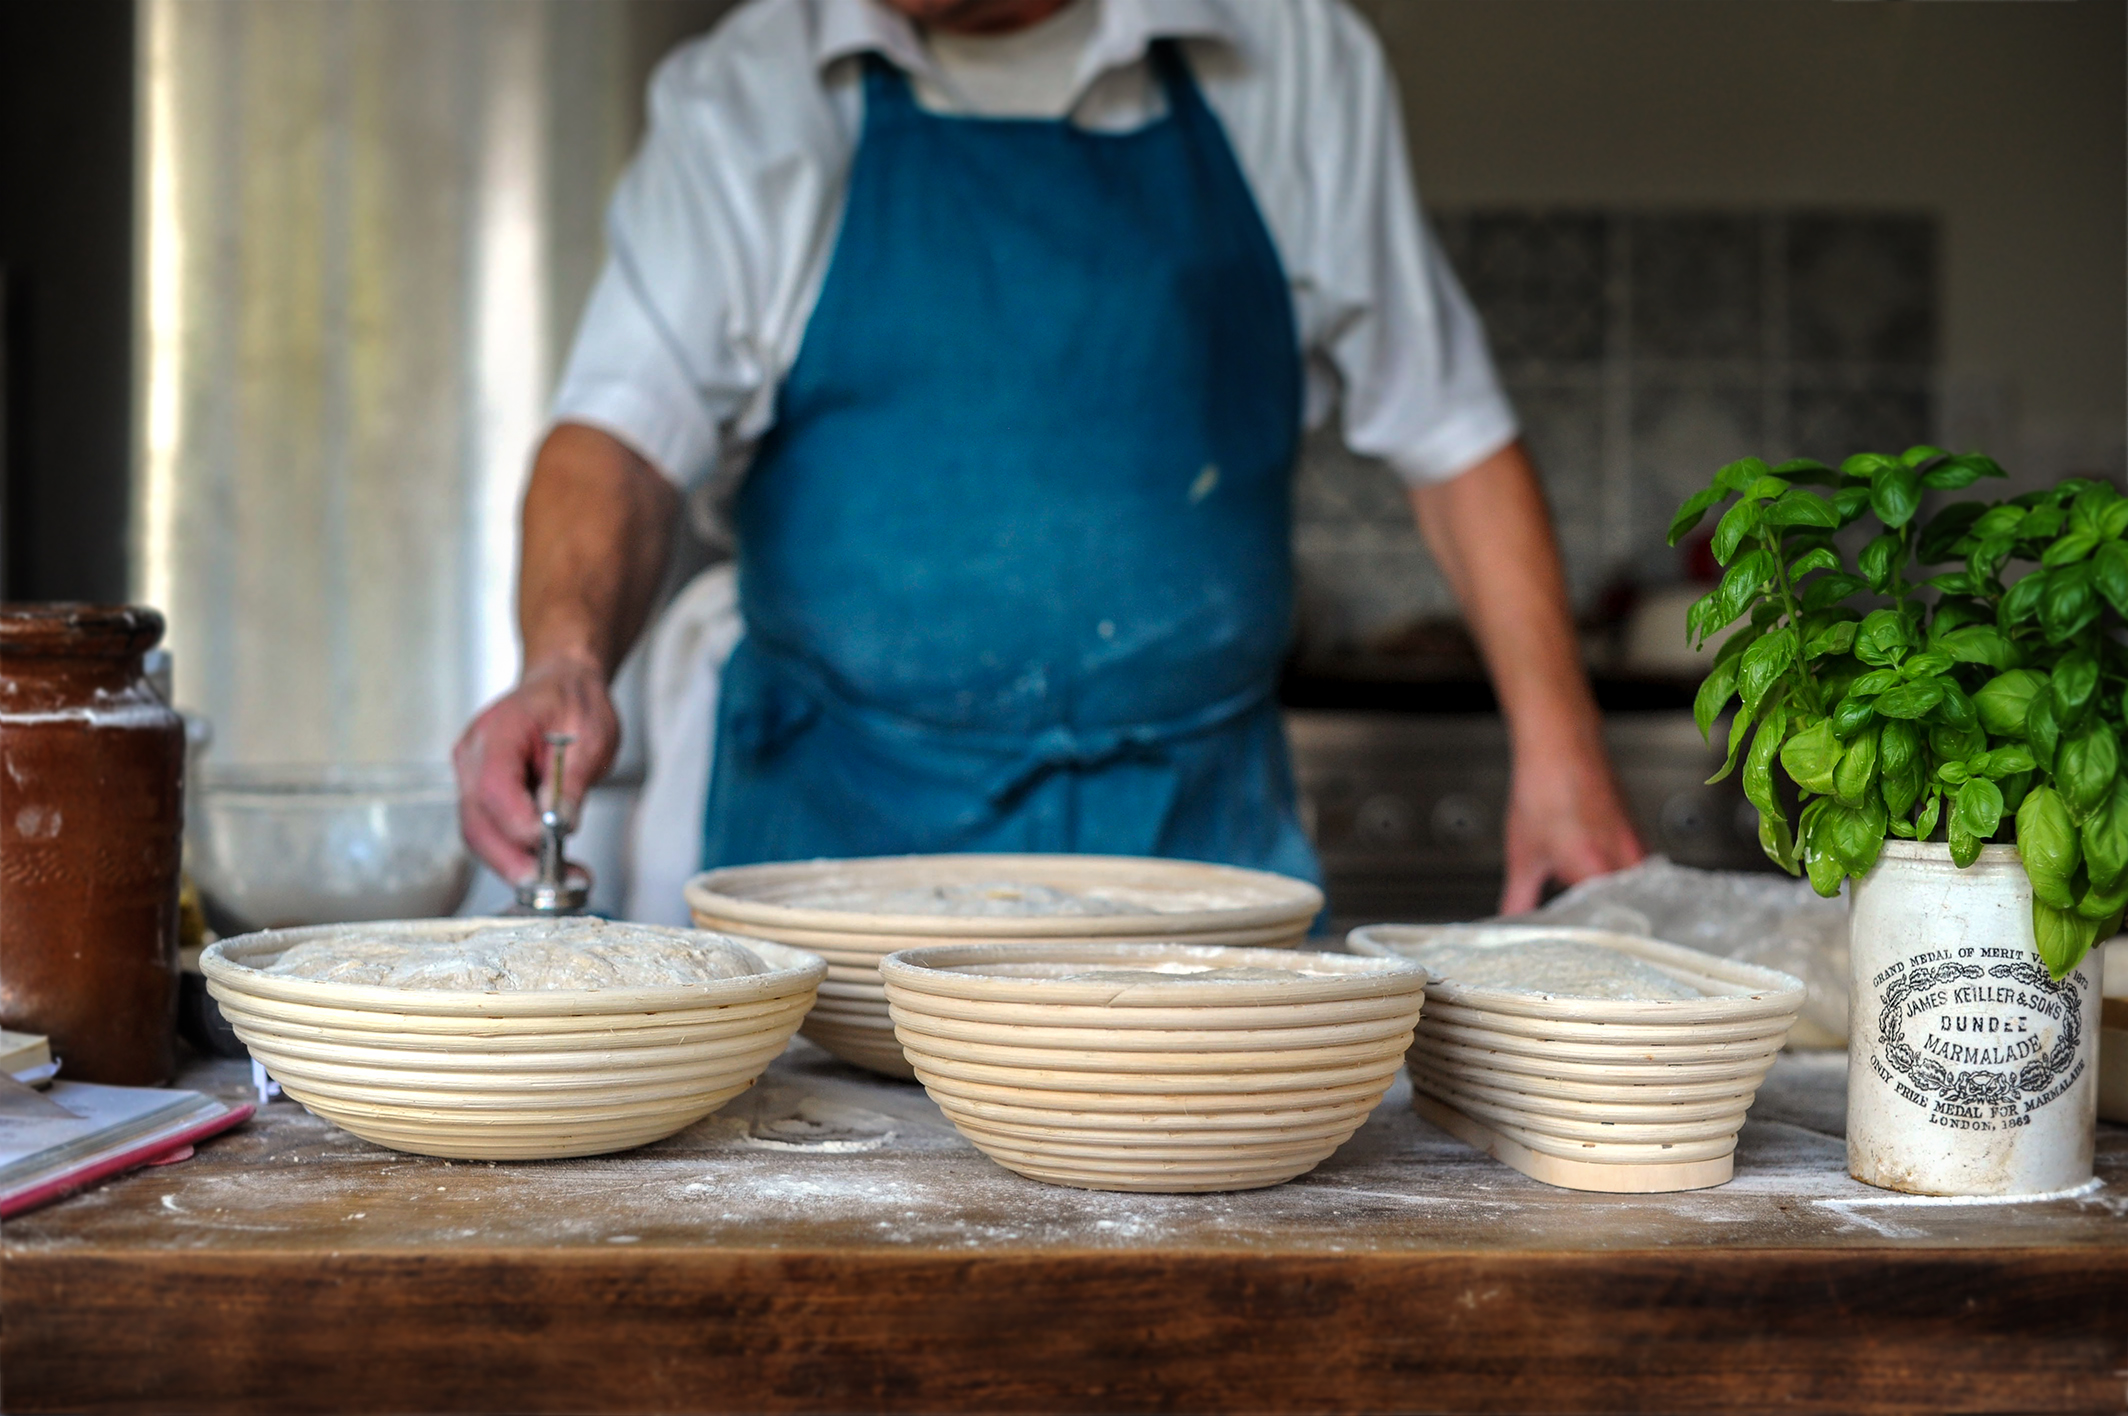
What is a banneton or proofing basket?
If you don’t own one yet, here’s what it is and what it’s used for: ‘banneton’ is a French word meaning ‘bread basket’ for proofing bread dough. Traditionally wickerwork, woven from reeds and usually lined with linen, as the dough would stick less to the flat fibres of woven flax. Today the name is also sometimes used for the German ‘brotformen’ - in English shortened to ‘brotform’ - that are often made from rattan or cane, without a cloth liner. Note that we always denote the basket by the nominal amount of dough it will hold (not the amount of flour).
The inside of the banneton is dusted with flour, as is the shaped dough, with the dough then placed inside, upside-down (with the seam of the dough upwards), to be flipped out later onto a peel, oven loader, tray or baking plate and into the oven. This means that the upper crust of the dough is protected during rising by being pressed against the cloth or rattan and that it dries out very slightly as the floured surface absorbs a little of its moisture.
Finding space in a bakery for the shaped dough to rise has always been an issue, so these baskets also provided protective cocoons for the dough as it rose, avoiding the pieces sticking to one another, preventing flour, dust or soot sticking to the dough’s surface, and making it easier to move the dough to a warmer or cooler part of the bakery (or even outside), to control the rising speed in the days before refrigeration. Bannetons were always expensive, so a bakery needed a certain prosperity, with customers that would appreciate the especially neat shape that the loaf would take on, and perhaps pay a little more for it.
Today we use them for a slightly different reason. Modern recipes often have a water content higher than those from 50 years ago, above 70% of the flour weight. But this type of ‘high-hydration’ dough tends to flow outward as it rises, and if simply left on a tray, will expand sideways rather than upwards. However, restrained by a basket, expansion can only be upwards. When it’s ready to bake, this more upright piece of dough can be quickly turned out, slashed, and placed in a hot oven that will set the crust and make the dough expand upwards as well as sideways.
What size proofing basket do I need?
You’ll have seen that proofing baskets are described with a weight. This weight, for example a 500g/1lb round cane basket, in the same way as for cake tins, gives an indication of the amount of dough (or cake mixture) and NOT the amount of flour that the basket (or tin) will hold. It’s not a perfect science – if you have a very fluffy white dough then it’ll have a greater volume than average, but outside extremes, the weights are a very good guide. Between weights? If you have 600g dough then the 500g one will just about handle it but much more, and if in doubt, go for the next size up.
How to use your new banneton or proofing basket
That all sounds straightforward, yes? Except when your carefully nurtured high-hydration dough goes rogue and sticks like glue to the cloth or rattan. Avoiding this is essential for a stress-free baking life.
1. Prepare your new banneton before using it. Rub the inside well with fine rye flour (the best flour to avoid the dough sticking), really getting it into the weave of the cloth. Patrick Thornberry, the founder of BakeryBits, suggests a light spray of water and a liberal dusting with rye flour before first use, and then a lighter use of flour in the banneton and on the dough at each subsequent use.
2. You can line a rattan brotform or banneton with a (rye-) floured piece of fine muslin, if you are using it to bake a high-hydration dough. However, if your dough is quite firm, it should be ok without a liner, if you sift flour over and into the rattan basket. This will give you the flour ‘lines’ around the baked loaf that many bakers hope for.
3. Don’t over-rise your dough: dough will stick to the banneton if it has over-risen. This is because the gluten starts to fail and break apart, and then the dough becomes stickier again. To avoid this, make sure the dough still has elasticity in it before shaping, by pinching and pulling on a piece of the dough during the first rise – often called the ‘bulk rise’ – before shaping.
4. Don’t let the dough get too warm during rising: warm dough is more likely to stick to the banneton, making it difficult to turn out. Check the temperature periodically, ideally keeping the final rise below 25°C if it’s a high-hydration dough.
5. Chill your dough in the banneton: if you leave the dough to rise overnight in the refrigerator, it firms slightly, and this makes it easier to turn out.
6. Freeze your dough for easier handling: should your dough feel sticky or overly liquid before shaping, or if you have concerns that it may stick to the banneton, try this trick. Place a square of floured muslin in your banneton (even a linen-lined one), place your sticky dough inside it then leave to rise as usual. Then, 45 minutes before baking, place the banneton in the freezer and let the dough start to chill and harden. Have your hot oven ready, take the very cold dough out of the freezer, turn it out onto your baking surface then peel the cloth off the dough before immediately baking.
How to look after your proofing basket
With the exception of the dishwashable proofing baskets, which can be, um, dishwashed after each use, the others are made from natural fibres and so will absorb some water. When the cane/rattan, couche cloth lined or wood-fibre baskets are used, they will develop a thin layer of moisture and flour which actually acts like black-iron pan seasoning does, to make the baskets release the dough more easily. However, between use it is important to let the baskets dry out thoroughly. Bakeries tend to stack them on top of their deck ovens between use to make sure that they are really dry. Traditionally the lined wicker baskets are left outside in bright French summer sunshine which is somewhat more scarce in UK. Most home bakers simply let them dry in a warm kitchen, or or (switched-off) and cool-ish oven, tap them to remove any excess flour and stack them away in a dry cupboard. If there is a lot of flour build-up then it can be brushed out once dry with a proofing basket brush.


